| |
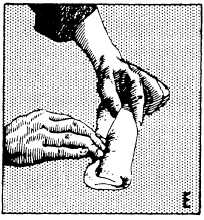
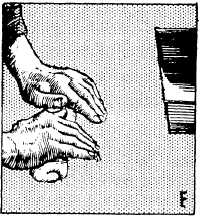
After the dough is molded into a loaf, place it in a
lightly greased pan. Each loaf should be placed so that
the molding seam is on the bottom, and the loaf should
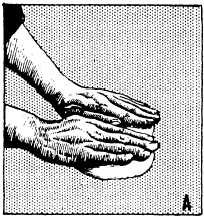
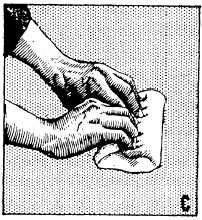
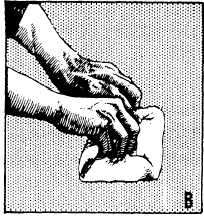
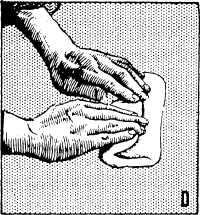
be long enough to reach the ends of the pan. Figure 8-1
provides an example of the molding and shaping of
dough into a loaf.
PAN GREASING.— The primary purpose of
lightly greasing the bread pan is to prevent the bread
from sticking when it is removed. Too much grease on
the pan surface can seriously affect the proofing, baking,
and slicing of the bread.
PAN PROOFING.— After shaping and panning,
loaves should be placed in a properly controlled room
or cabinet called the proof box or proof cabinet for the
final proof or pan proof. Temperature of the cabinet
should be maintained at 90°F to 100°F. During pan
proofing, the action of the yeast is speeded up by the
higher temperature and the gluten becomes more
mellow and elastic.
To determine whether the loaf is properly proofed,
touch it lightly with one fingertip and press in slightly.
If the impression made by the tip of the finger remains,
the loaf is proofed. If the imprint does not remain and
fills out when the fingertip is removed, the loaf is still
too compact and should be proofed more. Usually, 50
to 75 minutes is sufficient.
BAKING.— The final stage in bread production is
to place the pans of dough in an oven that is heated to a
temperature sufficient to heat the dough quickly
(temperature specified on AFRS recipes) and to cause
the carbon dioxide of the dough to expand, thereby
greatly increasing the size of the dough. The oven
PRESS GAS
OUT OF DOUGH
PRESS FIRMLY
TO SEAL
FORM RECTANGLE
FOLD RECTANGLE
LENGTHWISE
FOLD AGAIN
Figure 8-1.-Molding and shaping bread dough.
8-6
ROLL TO COMPLETE
SEALING
|

