| |
When available, the automatic topper press
may be used to press trouser tops. The topper
press eliminates the need for lays discussed above
and also speeds up production. This type of press
is discussed later.
Trouser Legs
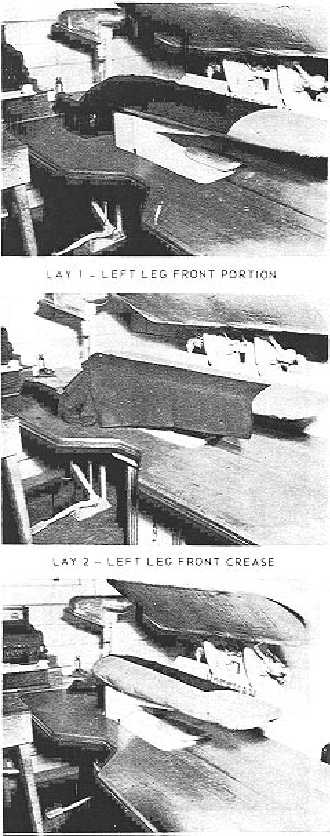
Lays for pressing trouser legs are given in
figure 6-6. The first step is to place the front
portion of the left leg on the buck—crotch at the
large end, the inside of the leg facing upward, the
seams lying on the center of the buck (see lay No.
1). Make sure that one seam rests upon the other
for the entire length of the leg. Apply steam to
soften the material and straighten the knee.
Lay the left leg, as shown in lay No. 2, on the
front of the buck so that the front crease is in the
center of the buck and the top of the trouser is at
the large end of the buck in a line with the second
or third button of the fly (or, if zippered, 2 or 3
inches from the bottom) in position so the crease
will extend upward as far as possible.
In lay No. 3, move the trouser leg to the rear of
the buck so that the back crease is lying on the
center of the buck. The leg should be placed so
that at least 4 inches of the seat will be creased.
Extend the crease as high as possible without
wrinkling the crotch.
Lay Nos. 4 (right leg, front portion), 5 (right
leg front crease), and 6 (right leg rear crease) are
substantially the same as lays 1, 2, and 3 of figure
6-6.
Uniform Coats
Check figure 6-7 (lays 1 through 6) and figure
6-8 (lays 7, 11, and 13) for the lays used in
pressing uniforms coats. Place the left side of the
coat collar and the left lapel on the rear of the
large end of the buck and press as shown in lay
No. 1. This operation shrinks the collar at the
gorge seam, restoring the shape of the garment
where it tends to stretch, from the seam at the
shoulder down to about 5 inches below the gorge
seam. Lay No. 2 is similar to lay No. 1 except that
the right side of the collar and the right lapel are
pressed. Make this lay on the front of the large
end of the buck. Lay Nos. 1 and 2 serve to restore
the balance of the coat so that the left front and
right front hang evenly.
After creasing the two sides of the collar,
place the collar on the large end of the buch (see
lay No. 3) so that the center is on the center line
of the buck. In most cases the collar is stretched
while
119.36
Figure 6-6.—Lays for pressing trouser legs.
6-11
|